Friday, June 3, 2016

Finding the Right Grill for You

Grilling season is upon us (hurray!), and with it, the longtime debate ensues over what kind of grill is best. If you don’t already own a grill of your own, this may just be the year to invest in one – but which to choose? There’s tons of information out there: gas versus charcoal, wood pellet versus electric. Here, we’ll provide you with a simple rundown of the pros and cons of a few so you know which grill is for you!

Grills are used for three different types of cooking:

1) Indirect heat smoke roasting – For a flavorful smoky flavor, close the lid and cook your favorite meats or veggies with the warm convection airflow inside.
2) Indirect heat convection roasting – This also uses warm air circulating around the food with the lid closed, but here, the heat source is off to the side.
3) High heat direct radiation cooking – This involves placing the food directly above the heat source, usually without a lid.

Keep these cooking methods in mind as you read through the following grill rundowns.

Wood pellet grills


Pellets are compressed pieces of wood shavings and sawdust that are used to warm these grills. The pellets fill the grill’s “hopper” and are then fed into a burn pot based on the speed dictated by the grill’s thermostat. The smoke produced by the burning pellets cooks the food on the grill. These grills run on electricity, which is great for competitive grilling (if that’s your thing). The heat in wood pellet grills is indirect, so it’s better for cooking larger cuts or quantities of meat for long cook times at low temperatures.

Once everything is set up on your wood pellet grill, you won’t need to do much adjusting – it’ll maintain the heat and airflow over the cook time, providing predictable outcomes. These grills are also fuel efficient. If a smoky flavor is your thing, you probably won’t love what comes out of a wood pellet grill, as it doesn’t produce a strong smoke flavor, regardless of the pellets you use. While we’re talking about wood pellets for grills, you’ll find either hardwood pellets or fruitwood pellets. Although they’re both great options, hardwood pellets will burn for a longer amount of time and are less expensive.

One of the first companies to sell pellet smokers was Traeger – and you’ll find a great selection of its grills right here.

Gas grills


Gas grills are a convenient, controlled grill option. They start easily, heat up quickly (within just 10 or 15 minutes) and hold temperatures steadily. They’re also easy to clean, with no ashes to dispose of – plus, most drips are vaporized (although there can be carbon or grease buildups underneath the burners that must be scraped clean every so often). Many fine-dining steakhouses use gas for their meats to achieve a dark sear all over, but this does require extremely high temperatures that many grills won’t reach.

Although consistent, the temperature control on gas grills may vary slightly depending on the weather. On a cold, windy day, setting the temperature to 275° may actually be slightly cooler. Gas grills can also be expensive as well as complex to assemble with their many different parts. Also keep in mind that gas is explosive, so gas grills can be dangerous if, for instance, the flame goes out but the gas is still on. Always be cautious when working with a gas grill.

For a variety of the best gas grills on the market today, check out our selection here.

Outdoor electric grills


Outdoor electric grills may be the best option if you’re unsure of the investment you want to make and don’t know how much you’ll actually use your grill. That’s because this less expensive option is easy to use – you literally just plug it in and press the on button. These grills heat up in as little as one minute and are safe with no gas or flames. Since outdoor electric grills run on electricity, you also won’t have to worry about stocking up on wood, propane or any other fuel.

Of course, outdoor electric grills do have some downsides. They’re usually much smaller than other grills, meaning you won’t be able to grill large quantities of food. And there’s no competing with the flavor – you just won’t get that strong grilled taste with one of these. You’ll find our selection of outdoor electric grills here in case you’d like to have a look.

So now that you know your grills, you probably have a pretty good idea of which one might be best for you. In case you’d like to browse through our entire collection of grills plus some smokers and fireplaces too, check out our selection here. Fill that empty space on your deck or patio – invest in a grill of your own and make your garden the place to be this summer!
Thursday, May 19, 2016

Pet Essentials as the Weather Warms Up

The weather is finally warming up out there, and we’re not the only ones who are excited to grab our sunglasses and bask in the sunshine. Our four-legged friends are also happily gallivanting around their spaces, enjoying their freedom. As the owner of animals, you may wonder what’s important to have around as the weather warms up. Here, we offer you a list of a few essentials for different types of animals: horses, dogs/cats, and also birds.

Horse Essentials in the Spring


1) Shampoo – spring cleaning doesn’t just apply to your home – spring is the time to bathe your horse, too, so make sure you’ve got what you need to do it. Pro tip: don’t bath them too often or you’ll dry out their skin.

2) Brush, Shedding Blade & Grooming Block – you’ll want to remove the dead hair from your horse’s winter coat, and then properly brush that hair once it’s been washed, so you’ll want to have the right horse grooming supplies for the job on hand.

3) Fly Spray – everyone wants to be outdoors in the springtime – including the flies. Keep your horse free of those pesky critters with some fly spray and your equine won’t have to deal with uncomfortable bites. Pro tip: test out your fly spray on just one small part of your horse before spraying their entire bodies, as some horses may experience allergic reactions to certain ingredients. Contact your veterinarian if this happens.

Spring Supplies for Dogs/Cats


1) Grooming tools – after building up their coats to keep warm all winter, your canines and felines will probably need to shed some of those extra layers, so why not give them a hand? Make sure you have adequate grooming supplies for this; depending on what kind of coat your pet has, you may need to do some serious brushing.

2) Shampoo – while you’re at it, it’s a good idea to bathe them as well. They’re already shedding those extra layers of hair or fur, so it’s the perfect time to get them fresh and clean for the coming season.

3) Tick & flea repellents – if your pet spends any time roaming through the outdoors, especially in any areas of high vegetation, you’re going to need a good tick and flea repellent. Whether it’s a collar or a squeeze-on liquid, protect your cat or dog against what can potentially be dangerous to both them and you. You can also find pet shampoos that include tick and flea treatment for cats and dogs, so check out those options as well.

4) Omega-3 Supplements – one unfortunate reality of spring is the prominence of pollen everywhere. You may notice it in your watery eyes or constant sneezing – and so might your pup. Giving your hound some omega-3 supplements like Salmon Oil is a great dog allergy treatment, and will also help to keep their coat healthy, immune system strong, and liver in working order.

What Birds Need in Spring


1) Bird feeders – if you don’t already have one, pick out a bird feeder for your yard. Depending on what kind of bird you want to attract, you can buy anything from a wire basket to a thistle feeder in a variety of variations and sizes. You’ll delight in the many types of different birds that come through your garden, with spring as the most active time for feeding. We offer some of the best bird feeders on the market today, so check out our selection here. Pro tip: make sure you give your bird feeders a good spring clean before the rush. For tube feeders, you can soak them in a mild bleach solution, then rinse thoroughly. Uncooked rice in a mixture of one part vinegar and four parts water can be used to clean those hard-to-reach corners.

2) Bird seed – it’s during the spring season that many birds return from their long migration journeys, so they need plenty of sustenance to maintain their energy. Seeds can also naturally be scarcer around this time of year, so your winged visitors will be especially appreciative of some bird seed right about now, if not already.

3) Nesting materials – many birds build their nests in the spring, so feel free to offer them bits of string or yarn, hair, or small strips of cloth to help them create their new abode.

Spring is an exciting time for many different kinds of animals. We hope you’ve found some tips here that you can use to help them adjust to the spring season’s changes. Let us know if you have anything to add, or would like to see more information about spring essentials for other animals, too.
Thursday, April 28, 2016

Spring Fencing: Tips & Details

Whether you’ve got farm animals that have just given birth, newborn animals exploring their new world or livestock enjoying their release from several long winter months inside the barn, your four-legged friends are probably out and about, grazing and enjoying their freedom. That’s why, throughout this spring season, it’s critical to have a reliable, strong fence to keep them in the right areas – and everything else out. Here, we offer some tips and general information on farm fencing supplies that might help you decide what’s best for your property.

The winter months often bring some wear and tear on fencing, so be sure to walk your fence line once spring arrives to assess any damages. If you have an electric fence, do a test run on your energizer to make sure everything is working properly. You can also use a live fence indicator that permanently attaches to your fence line and flashes to show everything is working as it should be. The ground is softest and easiest to work with during springtime, so take advantage by doing any repairs or building now.

Barbed Wire vs. Electric Fencing


In today’s farming world, the choice between barbed wire and electric fencing is largely dependent on what its uses are going to be. For many farms with animals, electric fencing is the predominant choice. It’s cost effective, both in materials and in labor, and is usually the safer option. In addition, it’s more effective and versatile as well as easier to maintain and longer lasting than most barbed wire fencing. There are limits, such as the risk of dangerous shocks, damage from thunder and lightning storms and complications from heavy vegetation growth, however, in most cases, electric fencing will likely be your best bet.

Barbed wire fencing options may be best for keeping intruders out of large properties and can be relatively cheap – however, the increased risk of injury both to animals and humans often negates the initial cost savings.

Types of Electric Fencing


There are four main types of electric fencing available today:
  • Electrified high-tensile wire fencing: The high carbon steel in this fence provides strong, long-lasting security and reduces elongation (sagging). In addition, it is resilient, versatile and low maintenance. This type of fencing requires fewer posts, making it less expensive than other types of electric fencing. This is the best option for installing a permanent fence over a large area. This fence option should be avoided, however, when containing fast-moving animals like horses, as running into it at full speed could cause serious injury.
  • Electric poly rope fencing: This type of fencing is thick and reinforced with stainless steel, making it an effective conductor. It is good for areas with high winds and is rust-free.
  • Electric poly tape fencing: This fencing option is a highly visible, strong, rust-free type of fence that is available in three widths: 12, 20 and 40mm. 
  • Electric poly wire fencing: This type of fencing is available on a reel, making it convenient for temporary fencing needs like subdividing pastures. It is also highly visible for animals. 

If you decide on an electric fence for your fencing needs, you’ll need to consider the energizer you’re going to purchase. This depends, of course, on the type of electric fence you’re using, but a few considerations should be:

  • The larger the area, the larger the energizer you’ll need
  • The need for a permanent energizer versus a portable energizer
  • The power source – 110 or 220-volt plug-in is usually best
  • The joule rating – this measures the stored energy in an energizer; fences require 1 joule of output per mile of fencing
One of the most common issues electric fence owners have with their power fencing is inadequate grounding. Proper grounding is critical for the electric current to keep animals contained and predators out. A rule of thumb is to use three feet of grounding rods for every joule of energizer output. So for a 3-joule energizer, you’ll need nine feet of ground rods.

Fencing and Animal Safety


When thinking about your animals’ safety, fence construction is a very important consideration and one that you should look into based on the type of animal you need to contain and the fencing option you’re looking at. Electric fences are generally a safe option, as the pulse runs through the fence every second (or less) meaning that the animal has time to get away after it has been shocked.  

If you have a barbed wire fence, one thing to be aware of: Connecting a power fence energizer to it is not recommended. Barbed wire fences increase the chances of an animal getting tangled and stuck, and a power barbed wire fence would then lead to repeated shocks. Although it is unlikely that these repeated shocks would seriously injure or kill the animal, it would cause unnecessary stress and is best avoided entirely. 


Fencing is an important part of farm life, and one that requires careful consideration. Feel free to reach out to us at Paris Farmers Union with any questions you may have about what is best for your farm. 
Tuesday, April 19, 2016

Choosing a Beehive: Buy or Build?

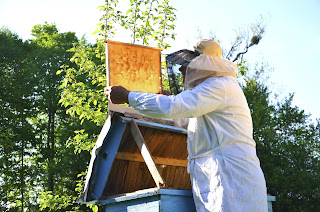
In its simplest form, a beehive is a place for bees to live where they are sheltered from the elements, have access to the morning sun’s warmth and are close to a reliable supply of water. Don’t let this fool you, though – inside each stacked wooden box is a fairly complex home for these six-legged creatures. Starting your own bee colony requires research and an investment in both time and money to set up and maintain this insect abode.

Whether you’re interested in running a beekeeping business or just want to try your hand at some home-grown honey, once you know you’re going to start a beehive of your own, you’ll need to decide how to go about getting your hive. The big question is: Are you going to build a hive or buy a hive? For many beekeeping enthusiasts, this may be an easy decision. But for those who aren’t sure, here are a few pros and cons to keep in mind.

Buying a Beehive

If you’re ready to kick-start your beekeeping endeavor, perhaps consider investing in a ready-made beehive for sale. You can skip the hassle of researching how to build a hive (and then building it) and focus more on the bees themselves.

There are basically three main types of beehives. Depending on what your end goal is (and the time you want to spend), you’ll be able to decide which one best suits your needs. The three types are:


  • Top Bar Hive – simple, easy access, requires frequent monitoring, no heavy lifting
  • Langstroth Hive – most common type of hive, with lots of resources and supplies readily available for affordable prices and relatively little maintenance required; highest honey-making capacity
  • Warre Hive – little maintenance required, few accessories required, lightweight boxes
This resource may help you to decide on what kind of hive you should get for your own garden. Once you decide on the type, have a look at the beehives for sale here at Paris Farmers Union, which include this maximum-strength 10-Frame Medium Super; this pre-assembled 10-Frame Deep Hive Body; and this Complete 10-Frame Beehive.

Building Your Own Hive

If you enjoy carpentry and have some experience, then why not try your hand at building a beehive for your garden? You’ll gain a better understanding of the inner workings of your hive, which will increase your chances of successful beekeeping. You’ll also save some money, although depending on exactly how much of the hive you build, you’ll still need to buy the materials and perhaps some of the parts. You can also buy a beehive set, which will provide you with all the parts of the beehive, ready to assemble. 

If you do decide to build your own beehive, make sure you pay attention to the timber you select. It should be untreated or protected using a natural, non-toxic coating (this is especially important for organic, natural beekeeping). 

You always want to make sure you’re buying parts or materials from a reputable seller for the best quality of materials that will make up a long-lasting, durable beehive. If you’d like to build just some parts of the hive but not the whole thing yourself, consider buying the frames, outer lids and queen excluder, as these are the more complicated components, and you can build the supers and the edges. 

If you choose to paint your beehive, use non-toxic paint and make sure you choose a light color that will reflect light and keep the hive from getting too hot. Also, do not paint the inside of the hive. 

Building a beehive requires extensive research and time, depending on your skills, so be sure to plan accordingly. You may want to reach out to a beekeeper in your community to learn from his or her experience for tips and best practices, which will vary by geographical location and weather. 

Here are a couple of tutorials on how to build a beehive that you may find useful:


Bees are an essential part of nature and perform about 80 percent of all pollination worldwide. Without them, our world would be a very different place. They’re also declining in numbers, with almost half of all hives dying in 2015. Help your own garden and the world too, all while reaping the benefits of fresh, delicious honey right in your own backyard.


Wednesday, March 30, 2016

How to Grow Seed Potatoes

Ever feel like the potatoes in stock at the grocery store just don’t cut it? Then perhaps it’s time to try your hand at planting your own! If you live in a northern climate, you can start getting ready for your crop now – and we offer a guide right here on how to go about it.


Let’s quickly review some of the basics, then we’ll go through the process itself. A seed potato is either a whole potato or a piece of a potato that is planted in the ground to grow a potato plant. There are various opinions on whether it’s best to plant whole potatoes (which decreases the chances of disease and rot) or pieces of potatoes (which will allow you to grow more potato plants). The choice is yours. However, you may want to do some research on the growing conditions in your area so you know whether potatoes there are prone to rotting, which is more likely if the soil is soggy. 

And now for the process itself! First off, you want to decide what kind of potatoes you’d like to grow. Grocery stores only offer a handful of options – and you wouldn’t want to use those anyway, as they’re treated with chemicals to prevent sprouting and usually aren’t tested for seed potato diseases. Here at Paris Farmers Union, we offer a number of seed potato varieties:

Goldrush – a medium-large russet potato with long spuds; excellent flavor and tastes good baked, boiled, or fried; stores well
Chieftan – red rounds potato with a high-yield potential; thin, coppery skin; firm, moist flesh; stores well
Cobbler – round, white, mealy potato; early maturing; delicious taste; medium size
Green Mountain – round white, late-season potato; high-yield potential; light tan-skinned, delicious taste; stores well
Katahdin – round white potato; smooth, buff skin; drought resistant; high yield potential; adaptable to various growing conditions; stores well
Kennebec – round white potato; medium- to late-maturing; high yield potential; stores well; grown for both fresh market and chipping
Adirondack Blue – blue-flesh potato with a purple tint; works well for boiling, baking, and mashing
Yukon Gold – yellow flesh potato with think, smooth eye-free skin; works well for both dry heat and wet heat cooking methods; waxy, moist flesh and sweet flavor
Superior – round white-skinned, white-fleshed, midseason potato; often used for chipping right from the field; high yield potential; commonly used to make potato chips
Russet – long, large potato with rough skin; high in starch; commonly used for baking
Red Pontiac – thin, red-skinned potato; shallow eyes and crisp white flesh; perfect for mashing; grows well in heavy soils
Norwis – round, white potato with smooth, light-buff skin; often used for potato chips
Norland – red-skinned, white flesh potato; often used for salads or boiling; not good for baking; short-season; adaptable to cooler climates

Our seed potatoes for sale are sourced from the reputable Maine Farmers Exchange and are available at all of our 11 retail stores, either by the pound or in 50-pound bags for the more ambitious potato farmers out there. 

Now that you’ve decided on the type of potato you’re going to grow, it’s time to consider your local growing conditions. Where you live will dictate when the time is right for you to plant your seed potatoes. You want to be sure to wait until the risk of a deep frost is over (light frosts shouldn’t be harmful). You also want to time it so that your potatoes have a window of 90 days for growing, so make sure the first frost isn’t creeping in toward the end of that period. 

Also consider the soil. The ideal soil temperature is above 50 degrees F – although if the soil is too hot, the potatoes will start to cook before they’re fully grown. Soil moisture is another factor: If the soil is too moist, your potatoes may rot. 

A popular technique that is used to decrease that 90-day growing period is “chitting” your potatoes. Chitting potatoes is the process of growing sprouts on your seed potatoes before planting them in the ground. Sprouting should be started about a month before you plan to plant the potatoes and involves placing the potatoes in a sunny spot or perhaps under a fluorescent lamp. When planting these chitted potatoes, keep the sprouts facing up – and don’t let them break. Chitting potatoes is useful if you’re afraid it will get too cold or too hot for the potatoes. 

As for the actual planting, your seed potatoes should be planted about five or six inches deep in the soil. If you’re planning to use pieces of potatoes, each square should be about one-and-a-half to two inches in size, or roughly one ounce, cut a couple days ahead of planting and kept in a cool, humid place for the interim. Separate each seed potato by two feet or so to ensure each has plenty of room to grow. Each potato – or piece of potato – planted should have one to two buds or spots from which sprouts will grow. As the potatoes are placed in the ground, point at least one of those buds upward so they’ll start growing in the right direction. 

A quick side note: It’s possible to save your seed potatoes from one year to the next, but this is risky, as potatoes can pick up soil-borne diseases that may affect future harvests.
Depending on the soil and growing conditions, you can usually estimate that for however many pounds of seed potatoes you plant, your harvest will be about 10 times that amount. So get ready for some home-grown goodness that adds delicious flavor to your plate. 

Feel free to share your experiences/questions/comments in a comment below. And good luck!
Tuesday, March 15, 2016

10 Essential Spring Lawn Care Tips

Spring is in the air, but your lawn still has a bad case of the winter blues. What do you need to do to repair the inevitable damage done by cold temperatures and restore your outdoor landscape? Don’t let spring lawn preparation needs catch you off guard. These 10 spring lawn care tips will help ensure that your march into the growing season starts out on the right foot.


1. Make a Plan 
When the days begin to warm, it's tempting to just roll up your sleeves and get started on your yard work. However, it's smart to take a few moments and make a plan first. After all, certain steps work best if taken in a specific order. As your dormant grass begins to awaken, assess your yard, note any problem areas, and decide what you need to do and when you're going to do it.

2. Get Your Equipment Ready 
Don't wait until your grass is too tall to discover that your mower isn't ready. Check that everything is operational before it's time to mow. Dull blades tear the grass, making it more vulnerable to disease, so don't forget to sharpen the mower's blades. Spring is also a good time to check that irrigation systems are in working order and to make sure that gardening tools like rakes, shovels, trimmers, and wheelbarrows are all in good shape.

3. Clean Up Your Outdoor Space
When winter retreats, it often leaves debris like fallen leaves and branches behind. Pick them up and either dispose of them or compost them. Are dead patches of grass a problem? Remove them with a metal rake so that the spot will be ready for repair. Don't forget flowerbeds and borders. Clear away any dead foliage and rake up the mulch in areas where new plantings will be going in. If necessary, use a square-head shovel to edge the beds, creating a crisp line between them and nearby areas of grass.

4. Rake Your Entire Yard
Raking isn't just for removing autumn leaves. It's also an effective way to control the thatch buildup that can compromise the health of your yard. Before you mow or apply any sort of treatment to your yard in the spring, rake it. This will untangle matted areas and remove dead grass, making it easier for your grass to get the nutrients it needs to flourish. It also gives you another opportunity to spot troubled areas that might need special care.

5. Do a Soil Assessment
Good soil is essential to a healthy lawn, and having the proper pH will head off many common problems. Soil tests are inexpensive and widely available, so use one to check your soil and see if you need to add amendments. Don't be surprised if your soil comes back as acidic. That's a common result of winter weather, and it can easily be corrected by adding lime.

6. Address Bald Spots 
Whether they're caused by heavy foot traffic, animals, or something else, bare patches are a blemish on your yard. Overseeding with grass seed will fix these bald spots by establishing new grass. Populating these bare spots with grass will also prevent opportunistic weeds from gaining a foothold in your yard by crowding them out.

7. Feed Your Grass With Fertilizer 
Water is a strain on grass, but fertilizer replenishes the plant's resources, giving it the strength it needs to form the lush, green carpet people love. You can use organic fertilizers like compost or select a chemical fertilizer. It's important to note that if you needed to apply lime to correct the acidity levels of your soil, you should wait at least three weeks before fertilizing.

8. Stop Crabgrass and Weeds Before They Sprout
Spring is the perfect time to stop crabgrass and weeds before they sprout. Seize control of the situation by applying a pre-emergent herbicide or corn gluten to your yard. Make sure to avoid any spots where you overseeded. Herbicides can kill your new grass.

9. Prune Trees and Shrubs 
Cold temperatures and winter winds often do a number on trees and shrubs. Use a handsaw or hand pruners to trim away dead or damaged branches, pruning back to live stems. Being proactive keeps your plant healthier and more attractive, and taking branches down under controlled conditions means that you won't have to worry about them causing harm by falling on something.

10. Maintain Your Hardscaping 
When the subject of lawn care comes up, most people focus on their living landscaping, but hardscaping features like sidewalks and patios are also something to consider. An integral part of your outdoor spaces, these features can use a little care too. Reset heaved pavers, rake gravel and stone back into place, and refill joints between flagstones or pavers with sand or stone dust. If leaf stains or moss is an issue, use a pressure washer to cleanse the surfaces.

With the right spring lawn care routine, your yard will be refreshed and ready to flourish. Before you know it, you'll be savoring the warmth of the sun on your skin and the scent of freshly cut grass as you enjoy your outdoor living spaces.
Wednesday, March 9, 2016

A Brief History of Maple Sugaring

When it comes to the history of maple sugaring in America, historians are unable to produce a definitive timeline. However, according to the University of Vermont, written accounts referring to its production date back to 1557. Scholars have speculated that maple sugaring goes back even more, since several Indian tribes share legends about the sweet product. Today, we explore a brief history of maple syrup and sugaring in the United States and Canada.


Early Indian Legends 


According to Time.com, one early legend tells a story of a tribe chief flinging a tomahawk into a tree. When he did, sap drizzled out, and his wife decided to boil venison in the substance. The Indians have shared another myth explaining that their ancestors came across sap flowing from a broken maple tree branch. Members of the Massachusetts Maple Producers Association believe that the Indians probably discovered maple syrup by trying “sapsicles.” These tree-generated treats are frozen maple-sap icicles that materialize on the tip of a broken tree stem.


Primitive Production Methods 


Many of the country’s first explorers wrote in journals. Their documentation tendencies have given today’s researchers a peek into the everyday lives of the northeastern Native Americans. According to these early writings, the Indians developed a maple sugar production process that dates back to at least 1609. Instead of living in one place, the Indians moved with the seasons. When winter gave way to spring, they would move into the forest to make their camps among the sugar maple trees. While there, the Indians would collect and process sap by forming V-shaped lacerations in the tree trunks. They would then gather the sap in containers. Since these early Indians did not have metal pots for boiling, they would produce maple sugar by removing the water from the sap through evaporation caused by hot stones.

People stored solidified maple sugar because they could use it throughout the year. New England’s Native Americans gave maple sugar as presents. They also used it for trading. The Indians even mixed it with berries, grains, and bear fat to create a dessert. In the summer, maple sugar was dissolved in water for a sweet beverage.

When the European settlers arrived, the Indians taught them their maple sugaring production methods. As early as 1790, people began looking for other ways to reach the sap because they discovered that cutting the trees was bad for them. A healthier way to get to the sap was to drill a small hole into the tree and insert a spile. This handy gadget released the sap more easily. People made the first spiles from sumac twigs because of the wood’s soft center. This section could be removed to form the device.

The colonists used wooden buckets to collect the sap from the trees. Once the sap was gathered, they poured it into large iron kettles and boiled the substance over an open fire. This process caused the syrup to thicken, and once it was thick enough to crystallize, they drizzled it into wooden molds to create blocks. Like the Indians, the settlers stored these blocks for later use.

Turning Sap Into a Commodity 


The next 100 years brought many changes to maple sugaring. For instance, producers replaced wooden buckets with metal ones, while metal tanks were used to store the substance. When it came to boiling, maple sugar producers started using large flat pans because they were more efficient. Manufacturers also constructed sugarhouses for boiling sap.

When the cost of imported cane sugar dropped, people started buying it instead of maple sugar. In 1788, the Quakers pushed back on this trend by advertising maple sugar as a moral alternative to granular sugar since slave labor was used in the development of cane sugar. By 1790, the maple sugar industry saw growth, with key advocates entering the picture. Thomas Jefferson, Judge James Fenimore Cooper, and Dr. Benjamin Rush all pushed the nation toward maple sugar.

The 1800s 


When it came to maple sugar production in the 1800s, inventions and patents were the rage. For instance, producers started using augers in 1810, while D. M. Cook requested a patent for an evaporating pan in 1858. Eli Mosher requested a patent for metal sap spouts a year later, and G.H. Grimm put in for a patent for his sugar evaporator in 1884.


Becoming an Industry 


In 1904, the Cary Maple Sugar Company was established, and it became North America’s largest producer of wholesale sugar. The industry mingled with technology in 1946, as this was the year that saw the first commercial power-tapping machine. Advancements continued to flood the maple sugaring industry. In 1959, Nelson Griggs patented a sap-gathering pipeline system. During the late 1970s, maple sugar producers started using reverse osmosis technology to reduce sap’s sugar content before sending the substance through the boiling process.

Researchers began investigating the health of maple trees during the last part of the century. In 1988, the North American Maple Project started looking into maple decline. Later, in 1999, maple sugar producers introduced the health spout. This invention used a smaller hole to collect sap.

Maple Sugaring Today 


Cornell confirms that technology and research have provided insight into maple sugaring. For instance, soil type, weather conditions, and tree genetics affect the quality of maple syrup, so those who collect it as a hobby should assess the area before they gather the product. It’s also important to protect the health of a maple tree by tapping it judiciously. A tree that measures 10 inches to 17 inches in diameter should only have one tap, while a tree that is more than 25 inches around can handle as many as three.

The history of maple sugaring is long and celebrated. Genuine maple syrup can only be found in the northeastern United States and Canada. Maple trees grow throughout the world, but America's northeast states and Canada are the only areas that have the proper climate for maple syrup. In fact, it’s mainly produced in Vermont, New York, and Maine. However, advancements have allowed the industry to expand to give the world access to the tasty substance.

---

We hope you have enjoyed this maple sugaring history! Interested in doing your own maple sugaring? Check out our supply of some of the best and cheapest maple sugaring products around!